Mining with Termux
Please note: Using your mobile to mine Zent Cash is not effective and should only be done for the Zents. It may also cause the phone to overheat and result in premature silicon degradation, shortening the lifespan of your phone.
Downloading and Compiling NinjaRig
- Download Termux from the Play Store or from F-droid.
- Upon downloading and installing, open the app.
- Run
pkg upgrade -y - Run
pkg install git cmake libuv clang nano -y - Run
git clone --single-branch https://github.com/ZentCashFoundation/ninjarig - Run
cd ninjarig - Run
mkdir build && cd build - Run
cmake .. -DWITH_HTTPD=OFF -DWITH_TLS=OFF -DWITH_OPENCL=OFF -DWITH_CUDA=OFF -DCMAKE_BUILD_TYPE=Release - Run
make -j2 - Run
cp ../src/config.json config.json - Run
nano config.jsonand adjust your config settings to match you wallet and pool etc. - Configure it.
- Run
./ninjarig-notls
Alternatively, instead of copy pasting each command individually you can copy paste what is below into termux after you open it.
pkg upgrade -y  && \
pkg install git cmake libuv clang nano -y && \
git clone --single-branch https://github.com/ZentCashFoundation/ninjarig && \
cd ninjarig && \
mkdir build && cd build && \
cmake .. -DWITH_HTTPD=OFF -DWITH_TLS=OFF -DWITH_OPENCL=OFF -DWITH_CUDA=OFF -DCMAKE_BUILD_TYPE=Release && \
make -j2 && \
cp ../src/config.json config.json && \
nano config.json
Then, it'll open the config file where you can configure it.
After that, you can run ./ninjarig-notls to run the miner.
Configuring NinjaRig
- Find and change the following lines in the config.json file:
   algo: "[algorithm]"
   url: "[pool address]"
   user: "[wallet address]"
   variant: "[variant]"
- Instead of
[algorithm], simply typechukwa. - In place of
[pool address], you'll need to choose a pool to mine towards. You can learn more about them here. - Instead of
[wallet address], simply paste your Zent Cash wallet's address.- If you don't have one yet, you can find out how to create a wallet here.
- Instead of
[variant], simply typechukwa.
Example config.json
{
    "algo": "chukwa",
    "api": {
        "port": 10000,
        "access-token": null,
        "id": null,
        "worker-id": null,
        "ipv6": false,
        "restricted": true
    },
    "autosave": true,
    "background": false,
    "colors": true,
    "cpu-threads": 8,
    "cpu-optimization": null,
    "cpu-affinity": null,
    "priority": null,
    "donate-level": 5,
    "log-file": null,
    "pools": [
        {
            "url": "stratum+tcp://ztcpool.sytes.net:10105",
            "user": "Ze4artgLD3pXn4YY1m4HREYsG5ZPE5dew5kxmuY6WtRa3tdAhnGgbqD6dtmX6wkidnX9uRgdtQsf1bvYoFhZjsvp1fUWd9Pqh",
            "pass": "x",
            "rig-id": null,
            "nicehash": false,
            "keepalive": false,
            "variant": "chukwa",
            "enabled": true,
            "tls": false,
            "tls-fingerprint": null
        }
    ],
    "print-time": 60,
    "retries": 5,
    "retry-pause": 5,
    "user-agent": null,
    "watch": true,
    "use-gpu": [
        "OPENCL",
        "CUDA"
    ],
    "gpu-intensity": [
        50.0
    ],
    "gpu-filter": [
        {
            "engine": "OPENCL",
            "filter": "AMD"
        },
        {
            "engine": "OPENCL",
            "filter": "Radeon"
        },
        {
            "engine": "OPENCL",
            "filter": "Advanced Micro Devices"
        }
    ]
}
- Press
^X(CTRL+X) - Press
Yto confirm your changes - Press enter/return (on default keyboard) to save file
- Start Binary.
./ninjarig
View your hashrate
The miner automatically prints out hashrate ever so often; however, if you'd like to view it at any time, simply press h.
Know that this is the most reliable source of your hashrate; the value displayed on your pool is an estimate and may vary wildly from the truth.
When possible, refer to the 15m avg.
Stopping the Miner
In order to stop the miner if ever needed, you can press ^C (CTRL + C).
You can also use the commands p and r to pause and the resume the miner, respectively.
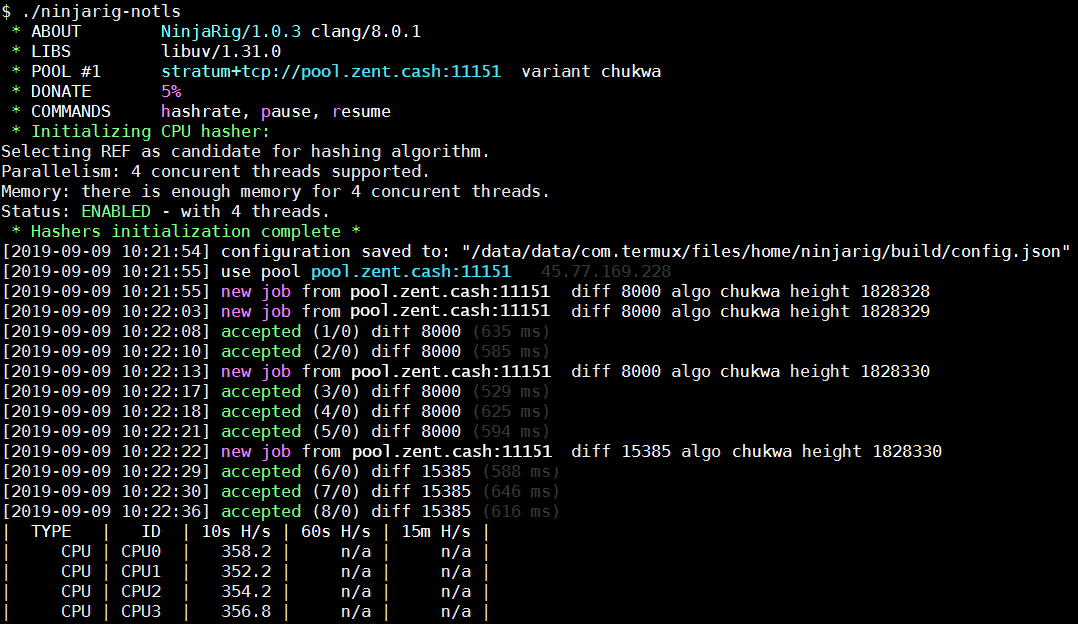
Expected Results
If all goes well, you should see something like this: